Entersoft QuickBiz
[Version 1.1.0, 14.03.2024]
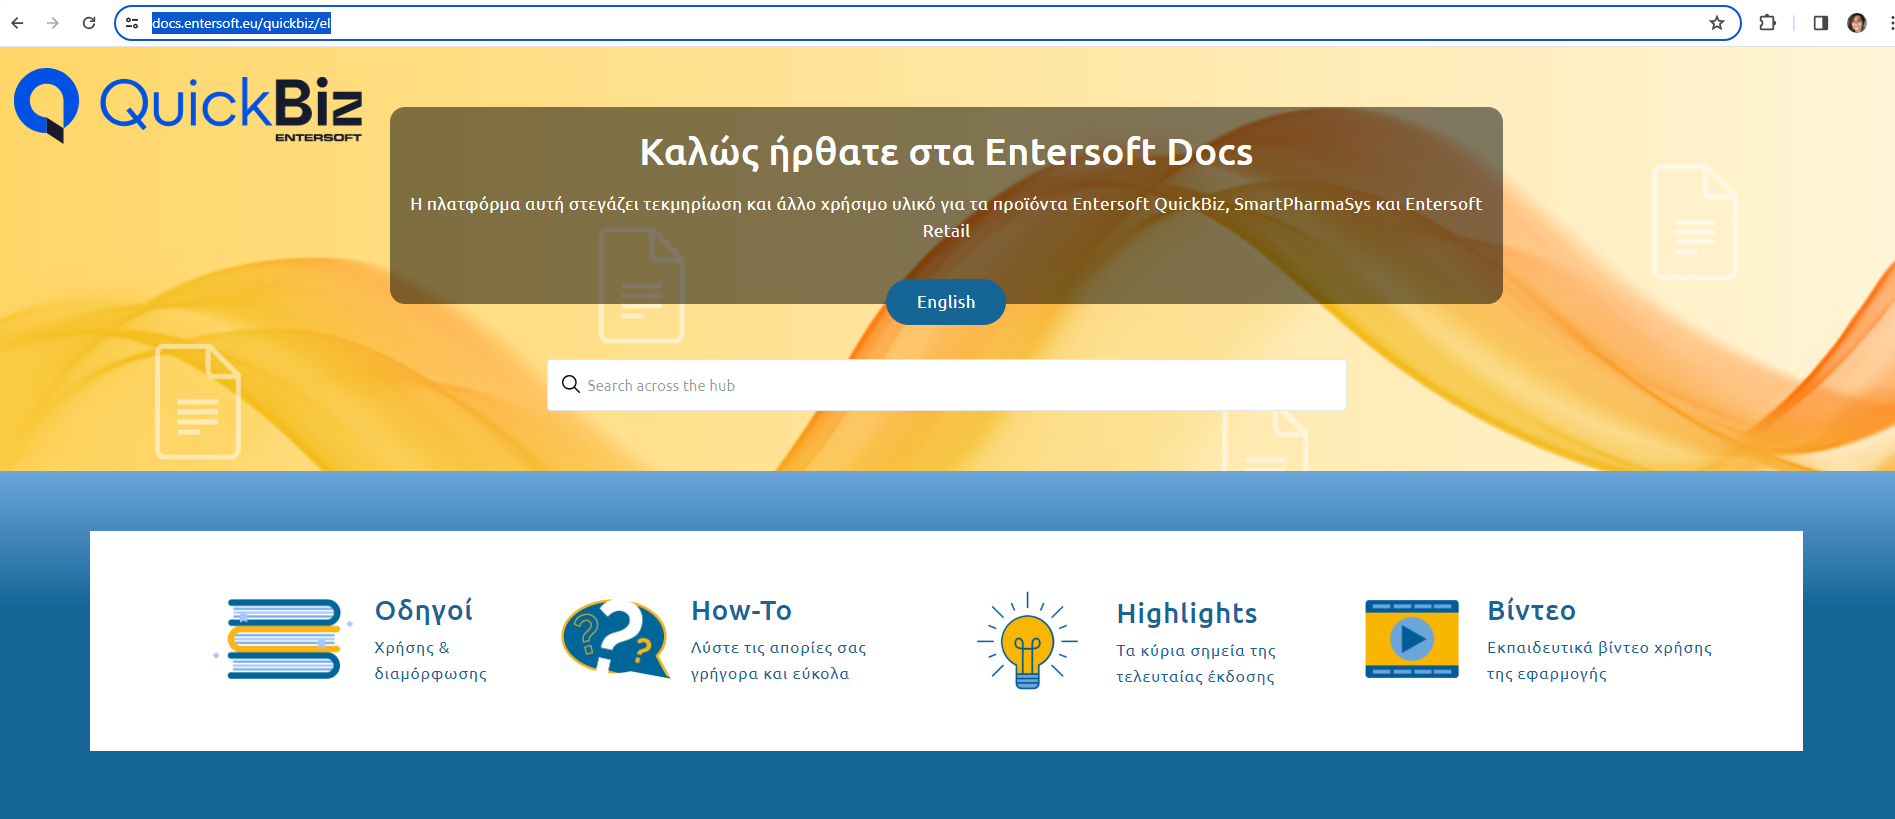
Documentation platform
The Entersoft Docs documentation platform is active in this version, for the QuickBiz family products.
Here, you’ll find useful documentation material regarding the application features, in text format for the Uesr Guide, as well as the Highlights of the latest releases, training videos and Q&As (How-Tos).
The Entersoft Docs platform is available on https://docs.entersoft.eu/quickbiz.
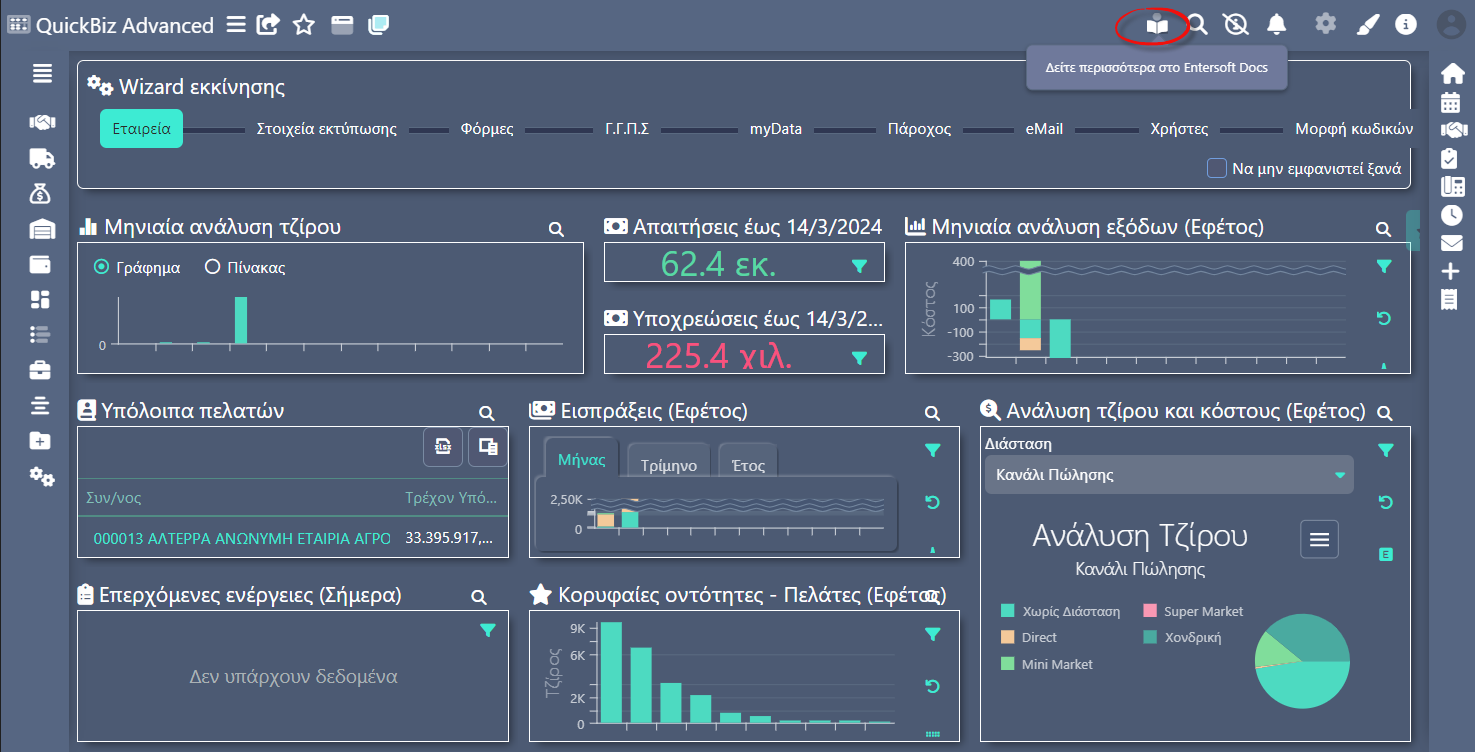
Or directly from within the application, from option  found on the horizontal toolbar.
Administration tools for List-type pages
Aiming to optimize user administration, a number of new tools has been integrated.
In list-type pages, e.g. documents, entities etc. you’ll find the following actions & tools available.
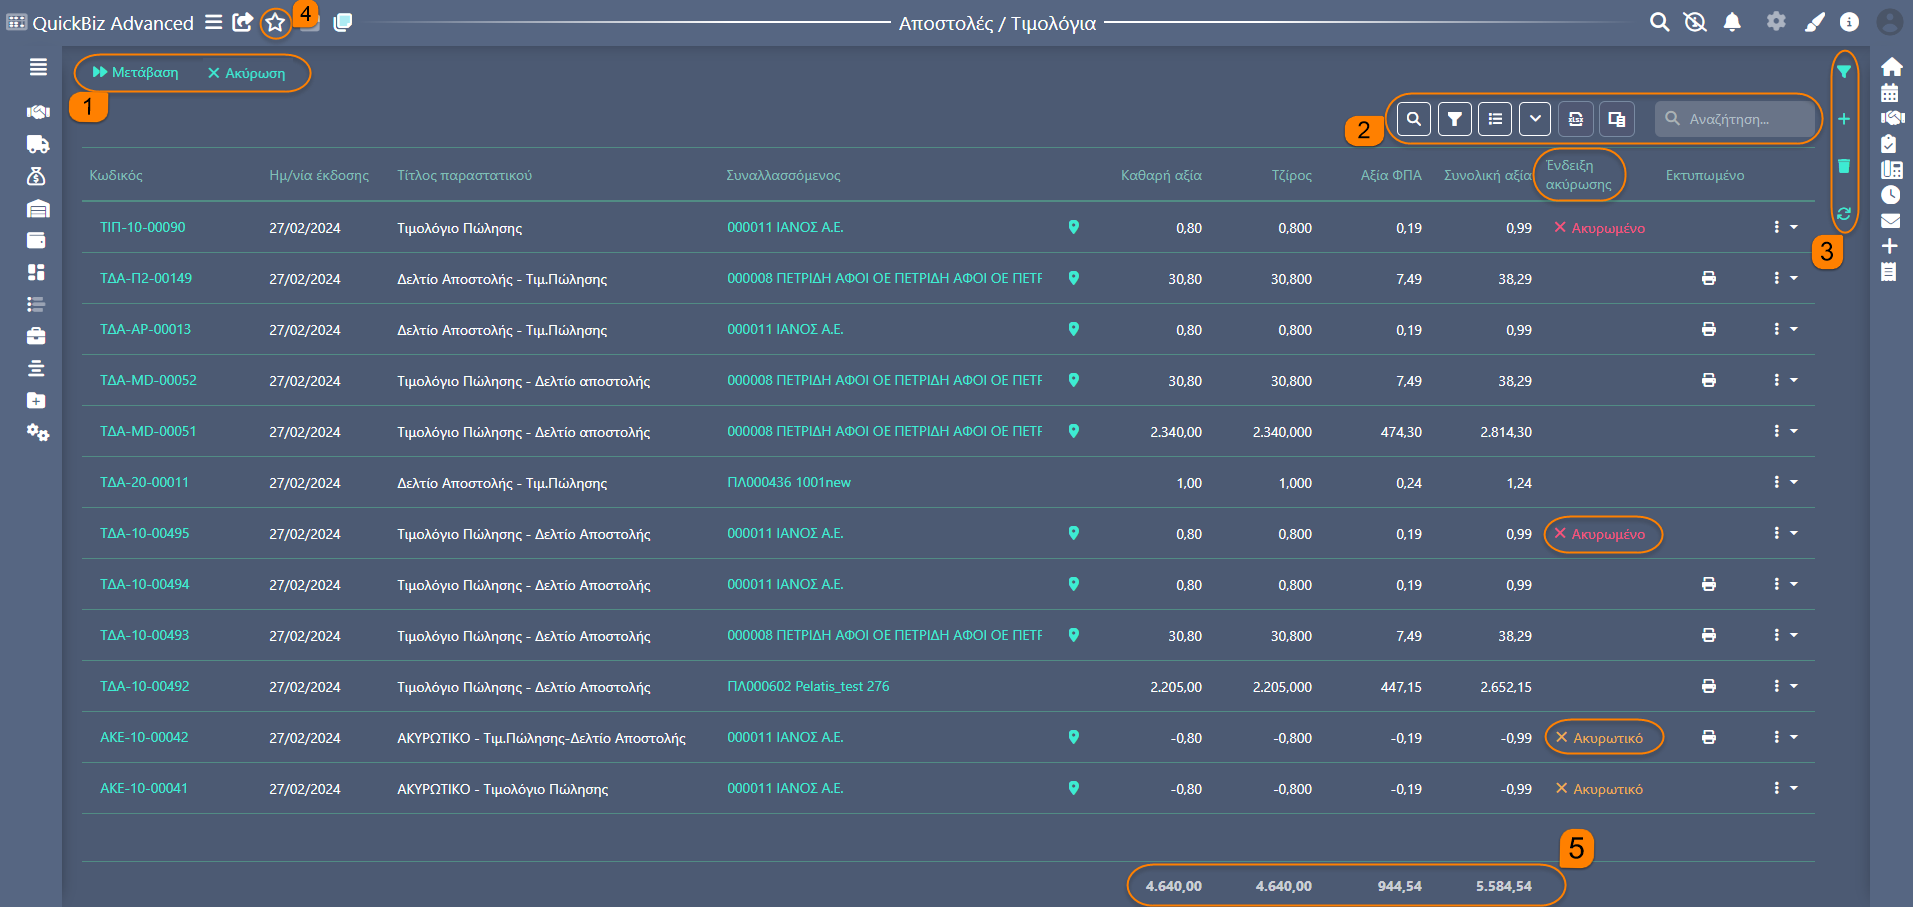
Actions
On the Action Bar you can always find the relevant actions that can be performed on every list.
For example:
 found in pages with Document lists. By selecting one or more documents, the Transition action performs their conversion into a new type of document.
 found in pages with Document lists. You can select only one document to Cancel.
Toolbar
On the toolbar, at the right side of every page, the following capabilities are available.

Filter line: by enabling this, the filter line appears with a search field under each column.

Search headers: by enabling this, at the right of the every column’s title (apart from columns displaying prices, values, quantities) appears the filter on which you can press to make certain selections from the list.

Grouping line: by enabling this, the indicator Drag a column here to group based on it appears on the right.
So, drag one or more columns here for the desired grouping.

Expand all: this action is especially useful in case you’ve applied groupings to the page.
Pressing it displays all lines under a grouping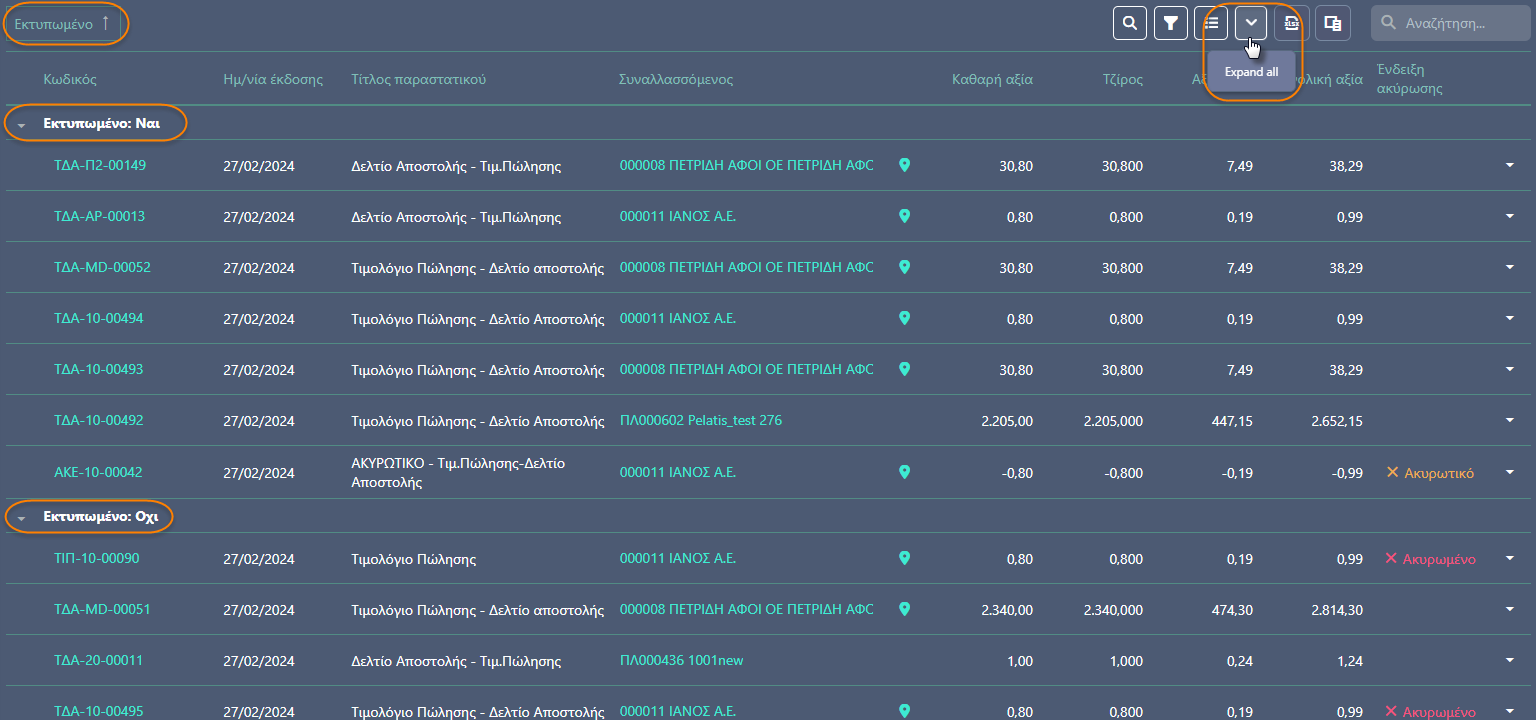
or
they all collapse and you can view only the titles of the grouping items

Export to excel: this action exports all the list data to an excel file, as these appear when the export happens.

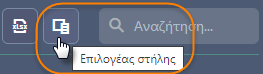
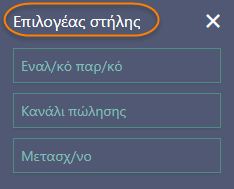
Column selector: by enabling the selector, a pop-up appears, where you can find additional available columns of the list and add them to the page, or remove columns by dragging into the pop-up.
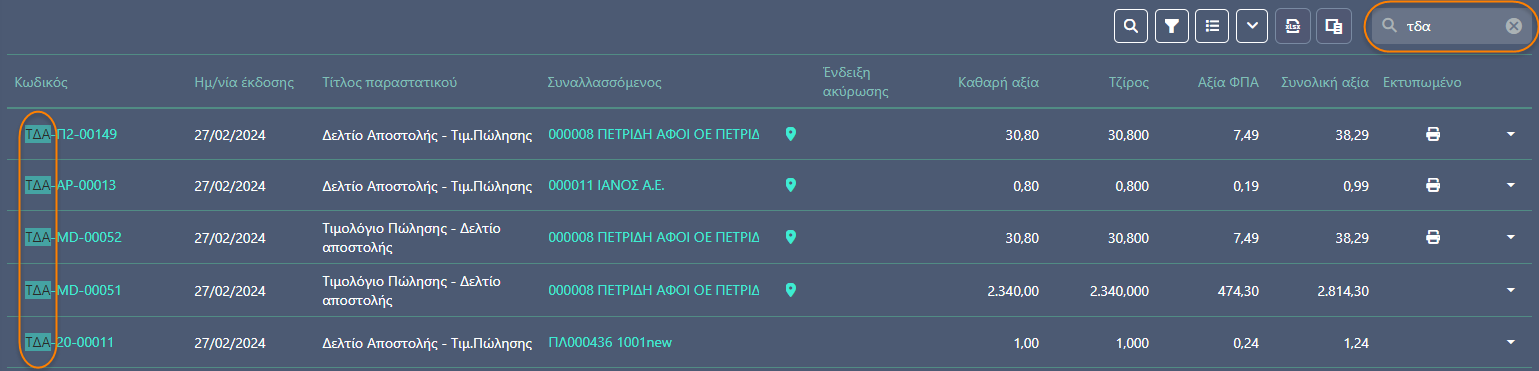
Search: by typing you can search to limit the page’s results.
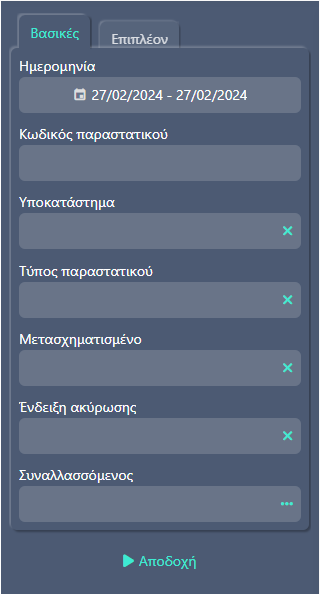
Parameter toolbar, top right of the pages, the icons vertically aligned:

Parameters: display the relevant fields with which you can filter the list data.

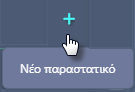
Create new: directly perform the creation of a new document, item, trade account, etc., based on the page where you’re running the action.
Delete: deletes the selected line or lines of the list.

Refresh: refreshes the data display and keeps the selected parameter values, as long as they’ve been entered.

Star to Save favorite layout: if you’ve made changed to the page’s appearance, using any one of the aforementioned tools, you can save your preferencesby clicking on the star.
So the page will keep the same format (the selected columns, filters, parameters, grouping, etc.) you saved it in and each time you visit it, it will be available with the settings that best serve you available.

Totals line: in all the columns that display value and quantities data at the end of the corresponding column, there will also be a total.
Management tables for grouping fields
In the Entities, Documents, Parameters of every application list, as well as other parts, such as Import data from third-party systems, there are fields where you can enter the best possible grouping for your data, to help you manage them as well as for optimized reporting.
In the menu Settings, you can see all the tables that you can manage in the same way:
Create new: at the end of the list, the new line appears immediately and at the right of the page, the new fields to fill-in. The Code is mandatory. By Saving, the list is updated and the new entry is available throughout the application.
Edit existing entry: select the line you wish to edit, modify the fields and save.
Delete: always select a single line to delete. It will not be deleted if it’s already been used in any entity or document. Once yo run the Delete action, it saves automatically.
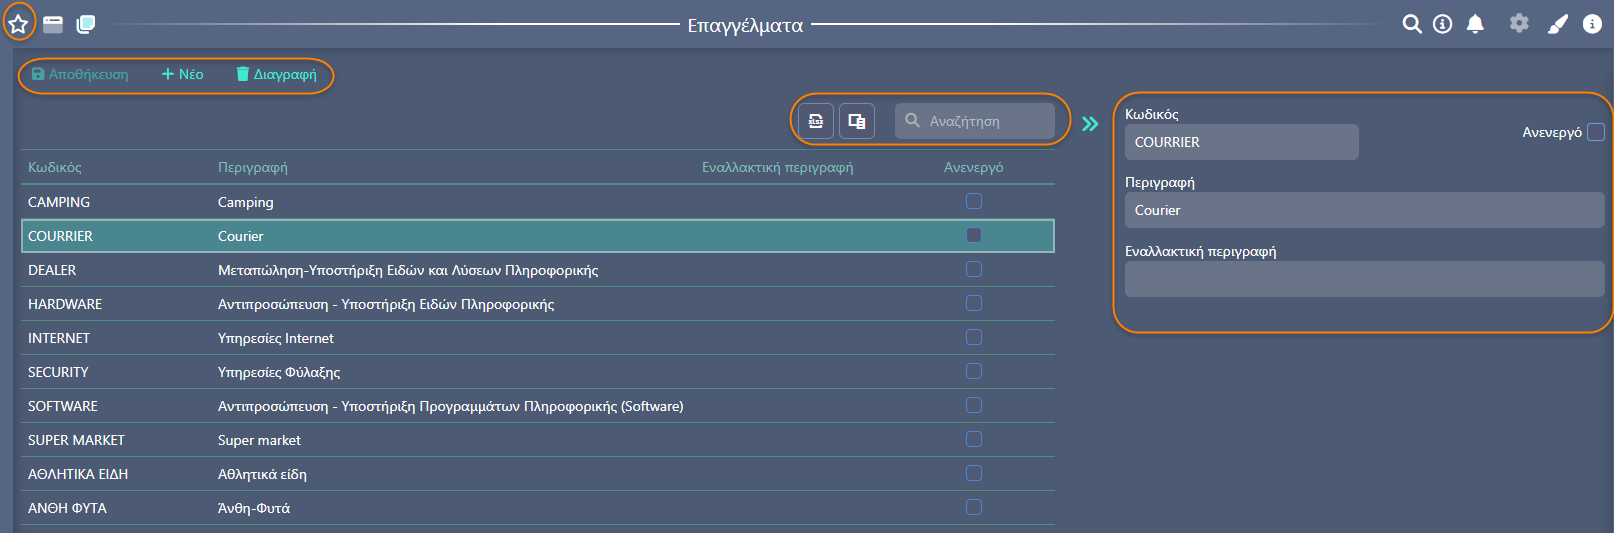
You can also export the list to an excel file from here, edit the columns with the Selector, as well as save your preferences using the star icon.
Document series
In this version, three new settings are available in the document series, aiming to protect the users that submit and print official documents.
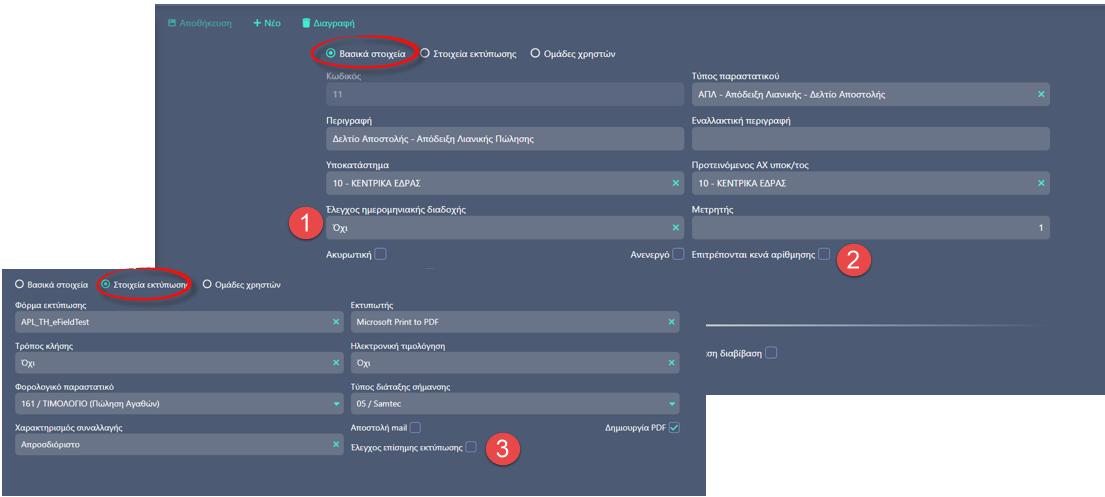
Sequential dates
This setting prevents the creation of a document at a later date than the last document. Additionally, it’s possible to delete only the last document issued with this series. For example, if documents Α001 to Α005 have been issued, you cannot proceed with deleting document Α004 without first deleting document Α005.
The check is performed either per year (fiscal year), or cross fiscal year. Be careful when using the second option (Per Fiscal Year), as it must be enabled only in document series that allowed to be entered «retrospectively» for the last day of the fiscal year that’s ending. For example, while it makes sense to allow it in value invoices or discount credits etc., it doesn’t make sense to allow it in Delivery Notes Delivery Invoices-Notes.
Gaps in numbering allowed
This setting makes it possible to delete interim documents. Provided that, as mentioned, that the Sequential dates are enabled, the documents cannot be deleted. The only document that can be deleted is the oldest one, which means there are no discrepancies in numbering. However, if you wish to also allow the deletion of interim documents, you need to enable this parameter.Official report check
Enable this classification in series where you wish to disallow the deletion or modification of documents that have been printed. Be aware that users designated as «Administrators» can modify these documents, but not delete them. Simple users cannot perform any of these two actions: Modify/Delete.
Set Empty series
Empty series are depicted with the symbol «~». In cases where you wish the series document codes to have format «SNV-00001», create a new series with symbol «~».
Taxes – Withholdings
It is not possible to cumulatively calculate taxes-withholdings. That means, withholdings that can calculate their value «cumulatively» (e.g. withholding of 3% on the final value after applying the previous withholding). Concerns taxes-withholdings that are NOT deducted in the document lines but calculate their value autonomously.
| The calculation can be performed in two ways.
|
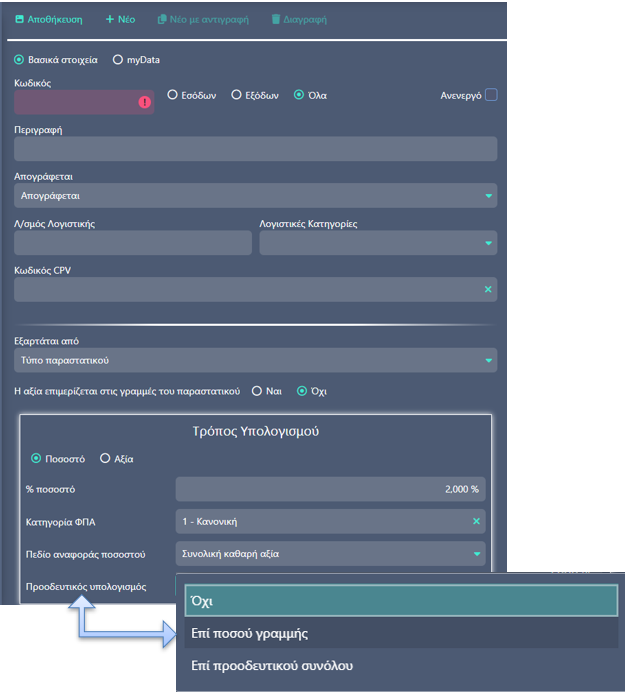
Example
1st withholding. Calculates a 20% withholding on the net value (100*20%=20€)
2nd withholding. Calculates a 2% withholding on the previous line, meaning the 2% of 20€ resulting in 0,40€.
3rd withholding. Calculates a 2% withholding on the cumulative total, meaning on the net value 100 minus the previous withholdings 20,4€, so 79,60*2%=1,59€.
Note that
As it appears, the application of the sequential method of calculation depends on the order in which the taxes – withholdings are entered in the document. The user must take care to enter this info in the order they wish them to be applied. In case of automatic application, the system takes into account the line SEQ. NO of the special account in the «acceptable» ones of the document type.
Other improvements
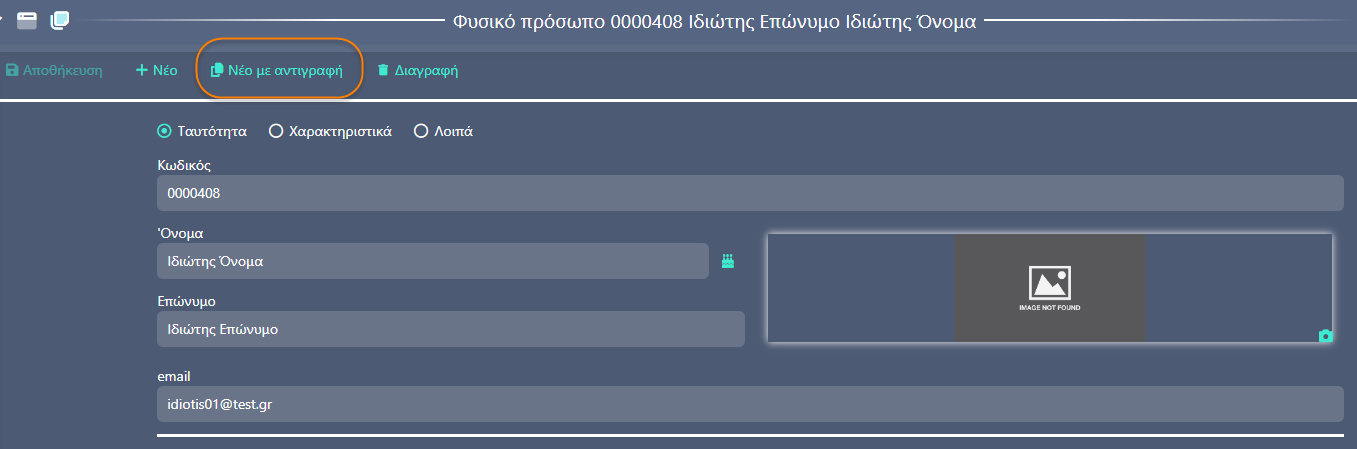
New by Copy
To achieve speed in entering data and avoid errors, action New by Copy is now available in all entities of the application. In the entity, by selecting the action, you can copy & transfer all the data in the new one that you just created.
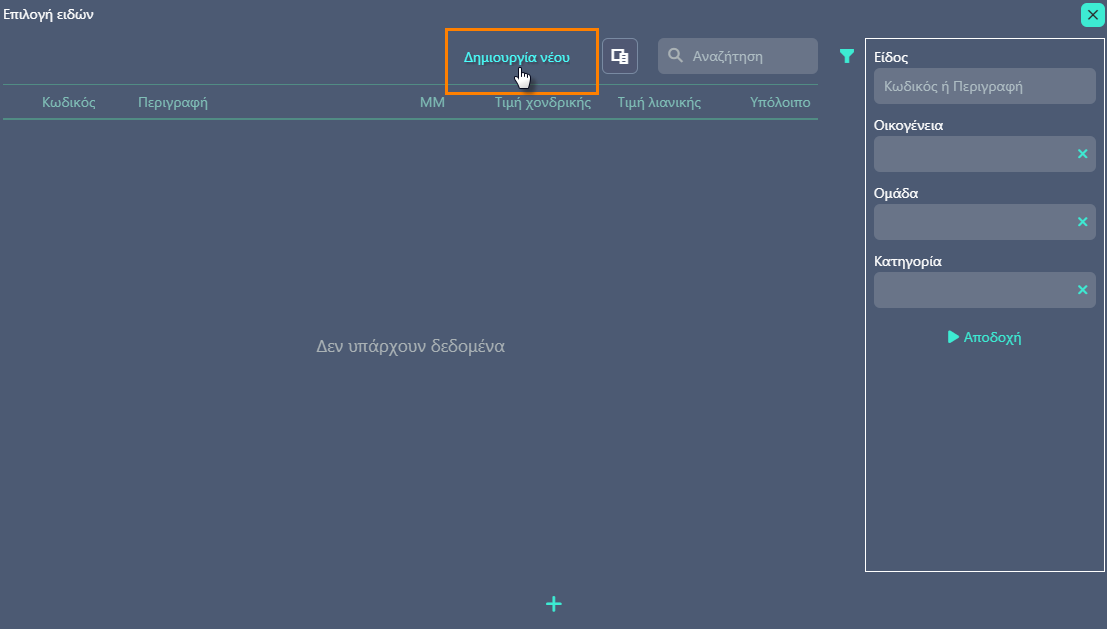
Create new item in lists
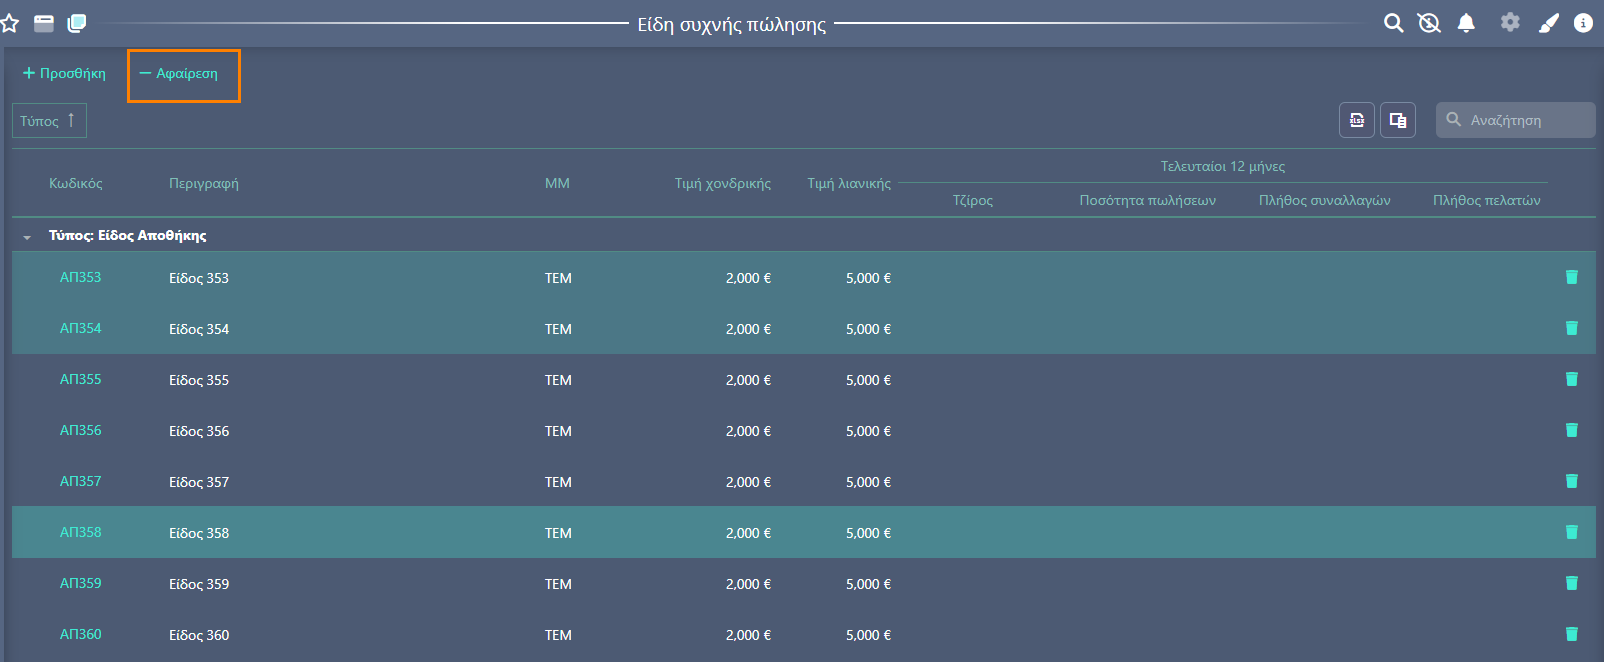
In lists eShop items & Frequently sold items it is now possible to Create new item or service. This action is available in the popup window of Item selection.
Add/remote action
In lists Items & Services / Frequently sold items & eShop items.
Improvements were made to these lists for the user to better manage actions and perform them faster by adding the Remove action for single or multi-selection of items to be removed from the lists.
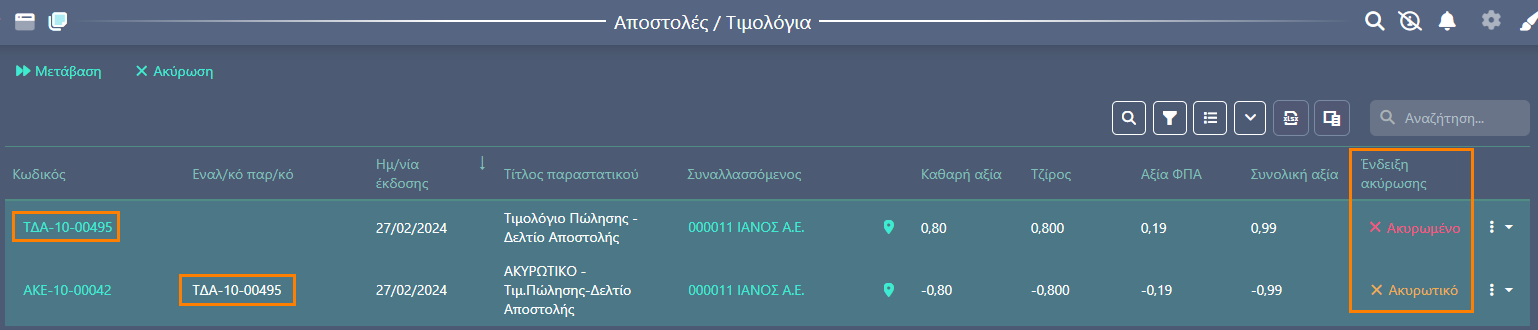
Cancellation status in document lists. The Cancellation status column was added, that indicates the document’s status in case of cancellation.
Cancelled. An indicator on the initial document after the cancellation process
Cancellation. Indicator on the new cancellation document
No indicator on standard documents