In this section, we can manage the application's users. As mentioned in the introduction, the application's initial version comes with 2 active users:
Supervisor or Manager (with full rights)
Admin (system administrator, without access to sensitive data).
In the user list, we will also find the basic user:
User (basic data-entry user), available if licensed.
In our list we can see users (1), administrators (2), licensed users (3), inactive users (4), as well as other informational fields:
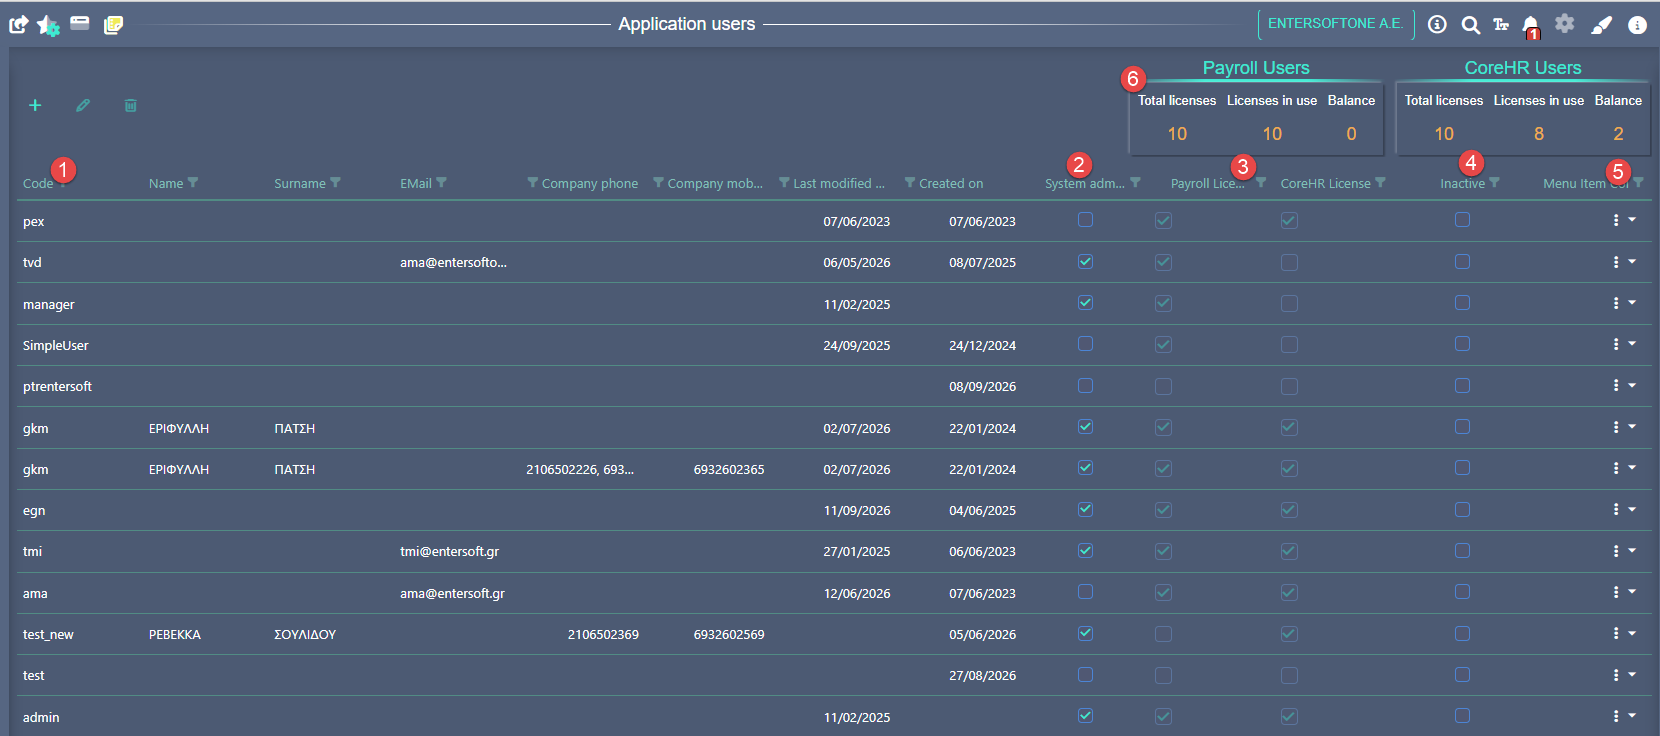
Depending on the licenses we have in our subscription, we can activate our users. On the right side of the horizontal menu (6), we can view the total number of licenses, the licenses we have activated, and the remaining licenses available for assignment.
By selecting the icon (5) on the right side of the page  , we have the following options, when logged in as a user with administrator rights:
Unlock / Lock the user (e.g. a user locked due to a password error).
Manage licenses (assign & remove a license).
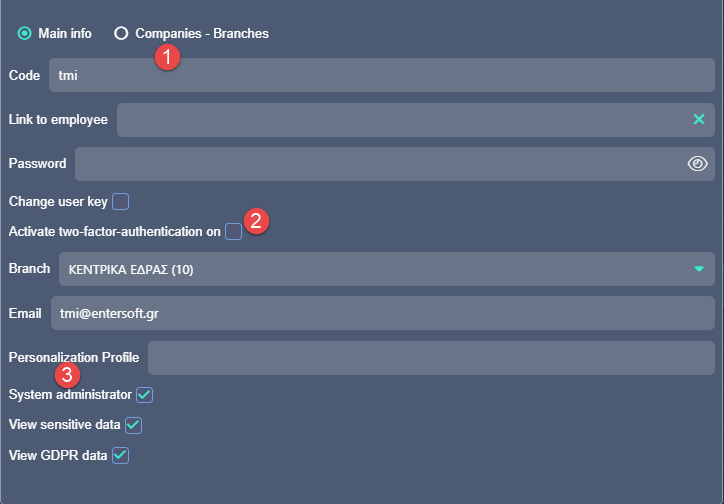
When adding or managing a user, besides the basic fields that must be filled in, the user is also assigned to roles (access to sensitive data, GDPR data). The popup page has 2 sections (Basic Information & Companies/Branches):
Basic Information
Code – name
Link to employee (optional)
Password
Change password (the user will be prompted to change it on first login)
Enforce two-factor authentication (2)
Branch (the company's registered seat/headquarters)
Rights (3):
System Administrator (YES/NO)
View sensitive data (YES/NO, e.g. salaries)
View GDPR data (YES/NO)
Two-factor authentication
At the user level, it can be configured so that 2 different levels of access are enforced, in order to secure both the user's access credentials and the data and applications the user has access to.
In the user management form, the requirement for two-step verification for access can be enabled.
On the user's next login, after entering the username and password, a screen will appear guiding the user through 2FA configuration.
To configure two-factor authentication, choose and install on your mobile phone one of the following two apps:
Google Authenticator .png)
.png) | Microsoft Authenticator
| Microsoft Authenticator .png)
.png)
In the app on your mobile phone, enter the alphanumeric key (32 characters) shown in the 2FA configuration dialog, or, more simply, scan the QR code. The mobile app will give you a six-digit number, which you will enter in the 2FA configuration form.
From the user's next login onward, after entering their credentials on the application's standard login screen, they will also be required to enter a new six-digit code, automatically generated by the Google or Microsoft Authenticator app you have installed. The six-digit code is valid for only a few seconds. If it expires, the app immediately generates a new one, which you enter promptly.
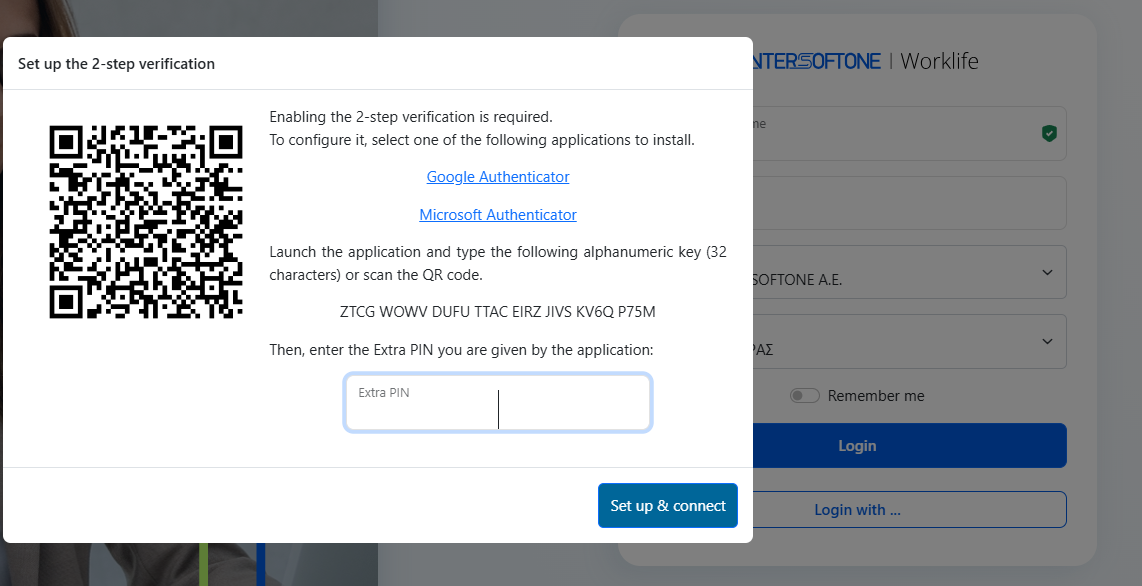
The two-factor authentication setup is performed once and is not required again thereafter, unless circumstances arise such as a change of mobile device. If such a change is planned/controlled, the user can access the 2FA configuration from within the application menu and repeat the steps above on the new device.
If such a change occurs unexpectedly (e.g. loss of mobile phone), then the 2FA configuration option must be deleted in order for it to be saved and activated again (reset/reinitialization).
Companies
The user can also be assigned to other companies (depending on licensing).
Users & Permissions per Branch
Enables the ability to manage users per branch and to display only the data of the branches to which each user has access rights.
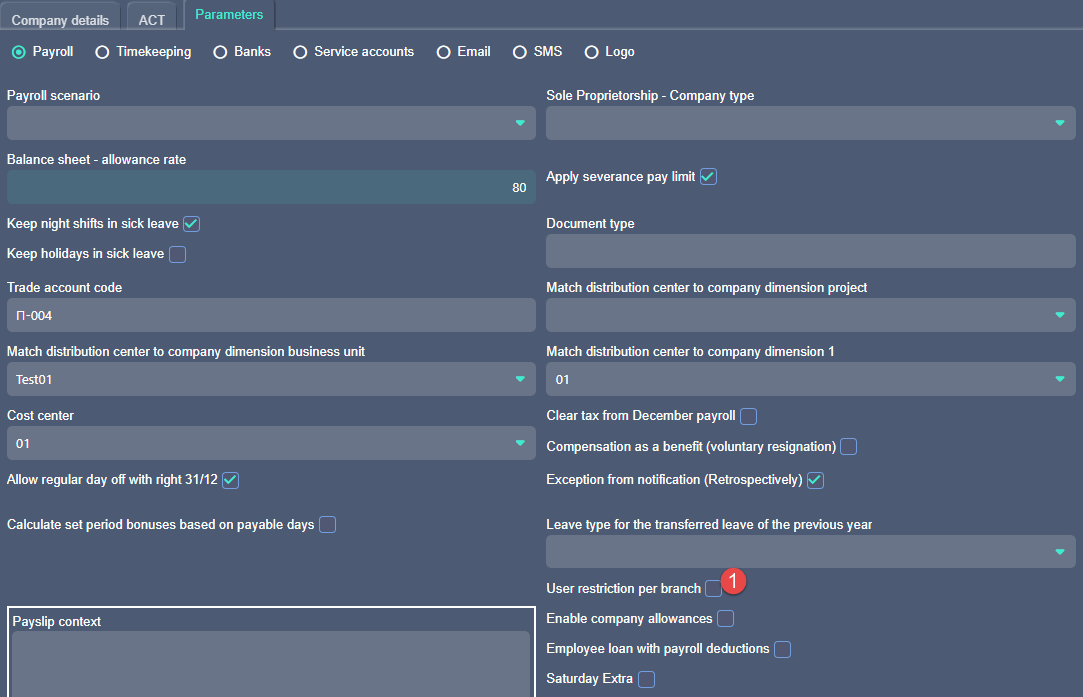
To enable per-branch access, we must first set the corresponding parameter in the Company – Payroll parameters:
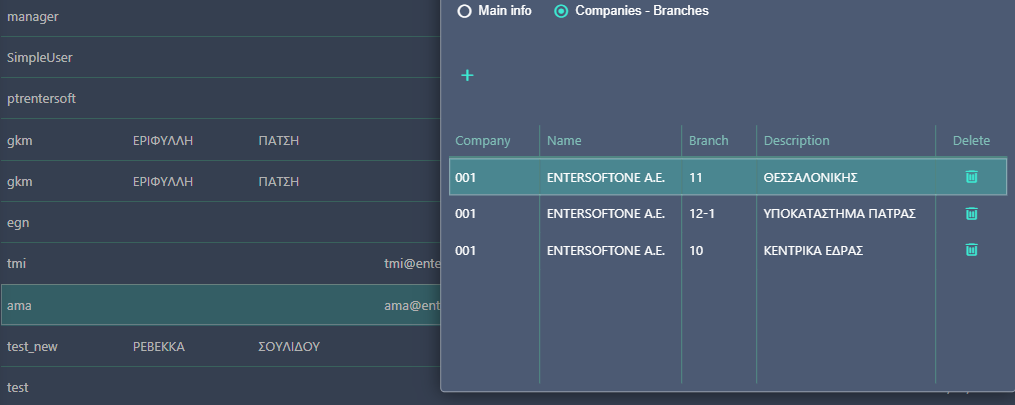
The branches a user has rights to are defined in the corresponding tab within user management:
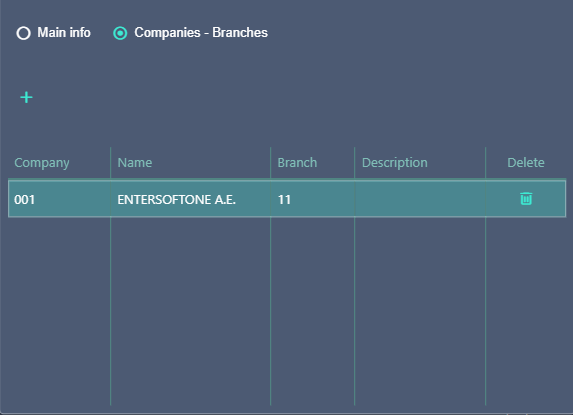
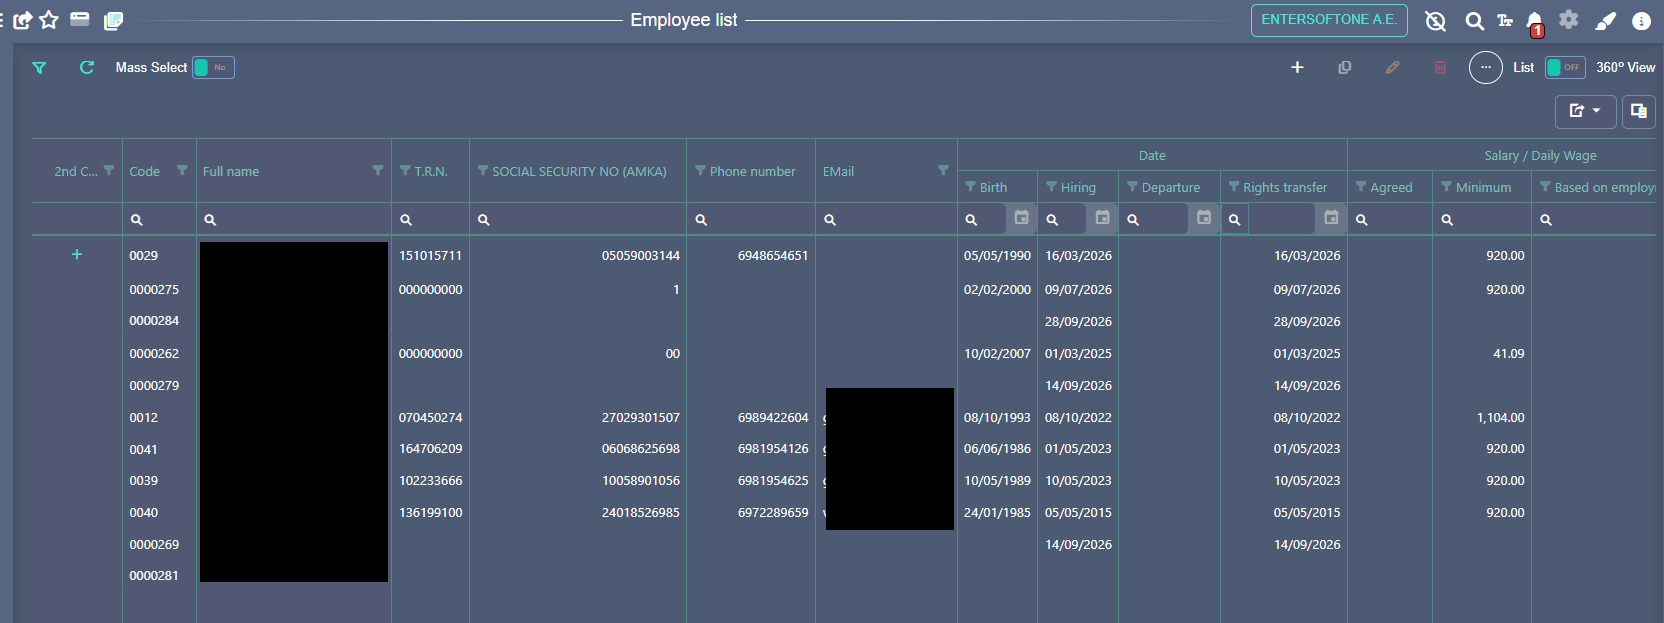
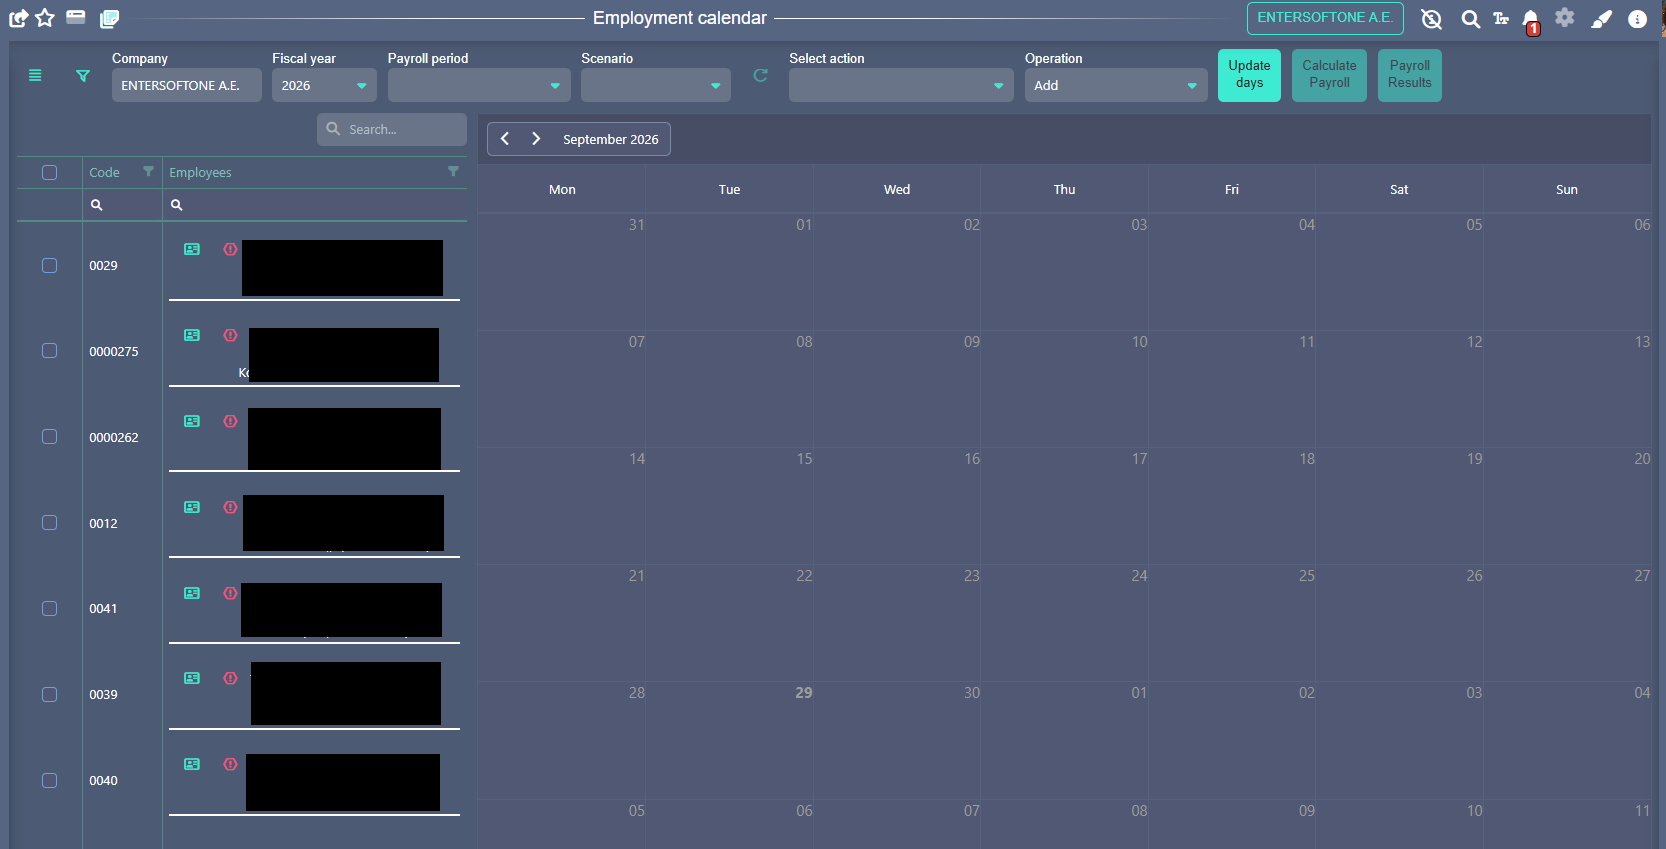
In our example, the user has rights only for Branch 11. Once logged in as that user, all views and functionalities relate only to the branches they have rights to.
Examples such as the Employee List, showing only the Employees of Branch 11:
The Employment Calendar, respectively:
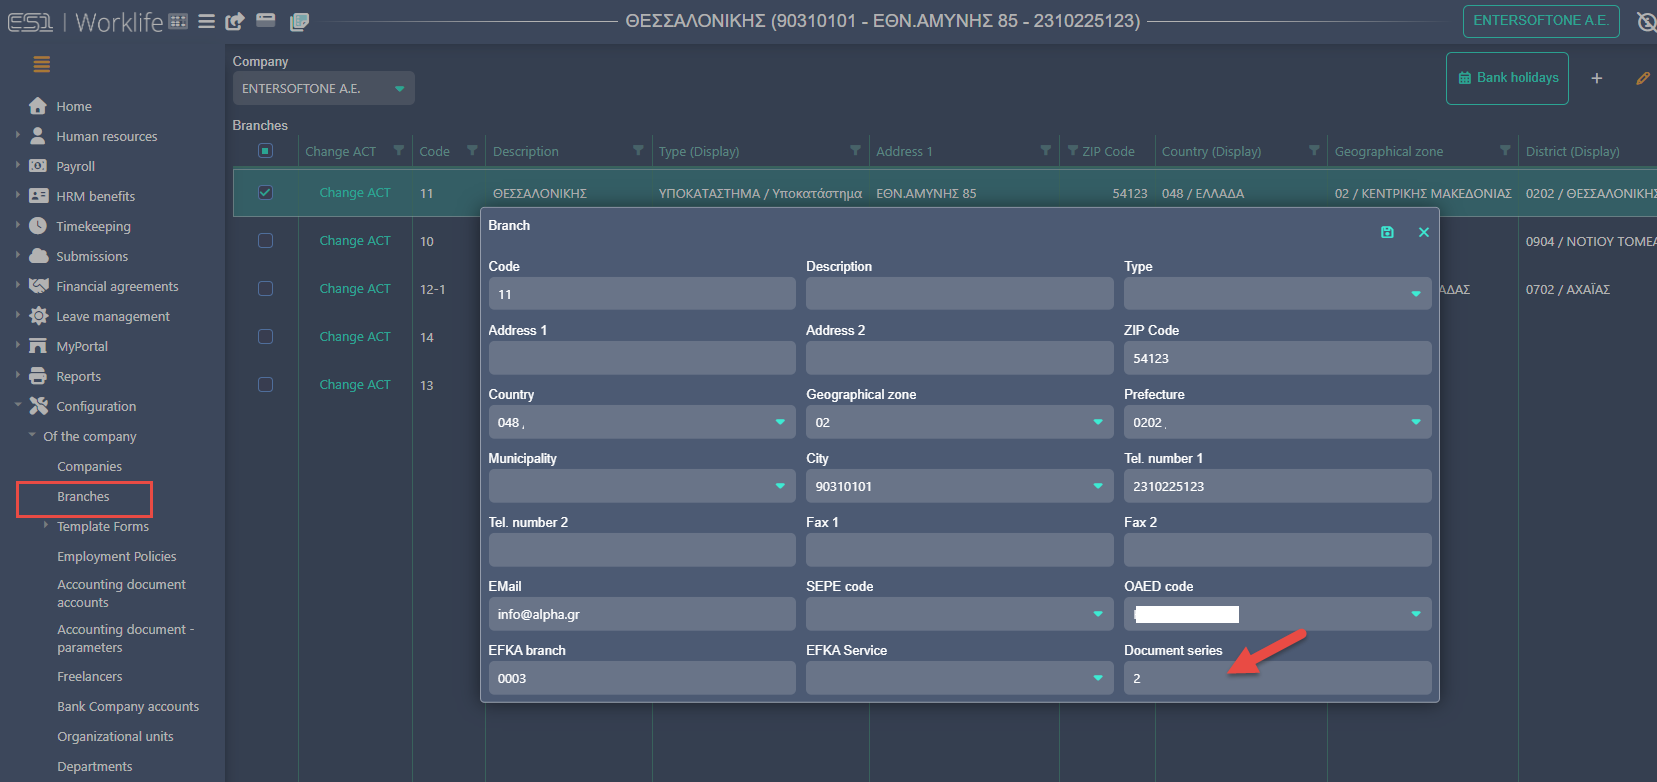
For the accounting entry, and in order to avoid incorrect usage, this functionality is determined by whether we use different accounting entries per branch.
Please note that the different numbering series leading to a different accounting entry per branch is defined in the configuration – Branches management:
Microsoft Entra - Google
Ability to log in to the application using Microsoft Entra (formerly Azure Active Directory) or Google corporate accounts.
When logging in to the application, select "Sign in with…" and then choose accordingly:
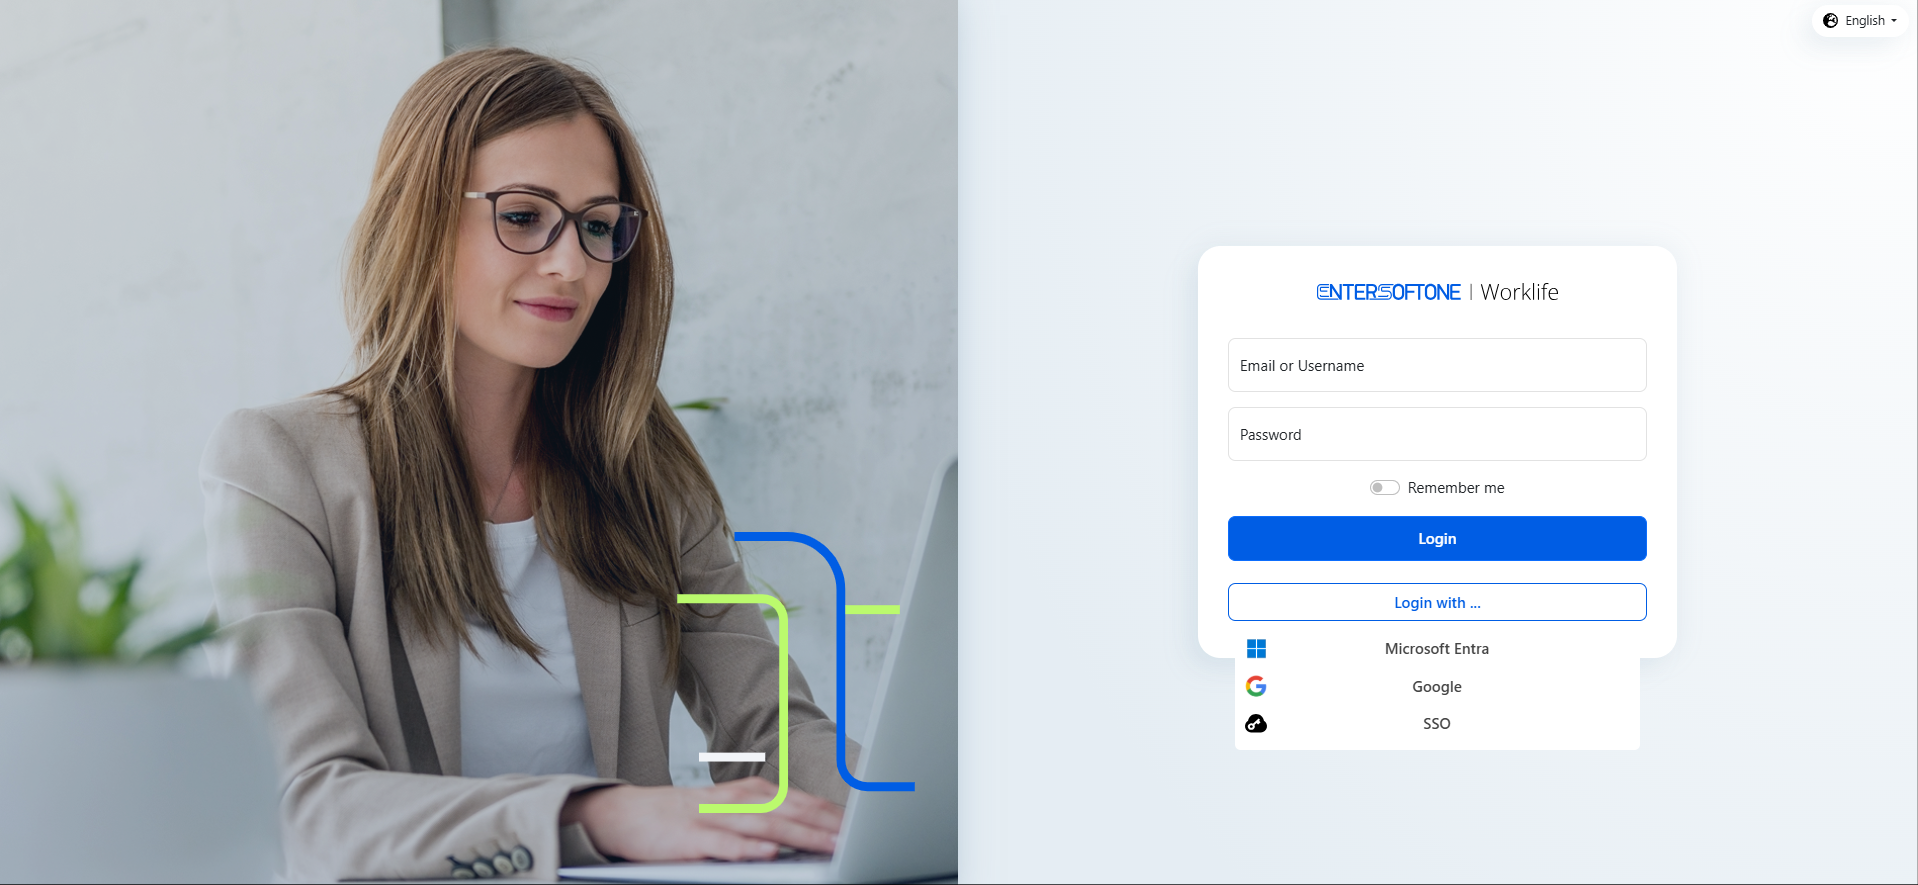
For this functionality to work, the email (from the corresponding account) must be entered for the users — whether for a payroll user or a myPortal user.